
30 Oct How to Prevent Facebook From Deactivating Your Business Page in 2024
Has your Facebook Page suddenly gone missing or unsearchable? It can be incredibly frustrating to lose a Page you have worked to hard to build and grow. A few years ago, Facebook had a bug that temporarily disabled numerous pages, while they resolved eventually, at least for some pages that reported it, it wasn’t the case for some Pages. Sometimes these bugs are server errors that happen per country. Unfortunately, there have been increasing reports now of Pages being invisible and some even being deactivated. While we cannot control how or what happens, the best we can do is to secure our accounts so that we can easily verify our identity and Pages later on with Facebook. Here are a few tips to secure your accounts.
Prevention is Key! Protect Your Account At All Costs.
Make Sure 2 Factor Authentication is Turned On
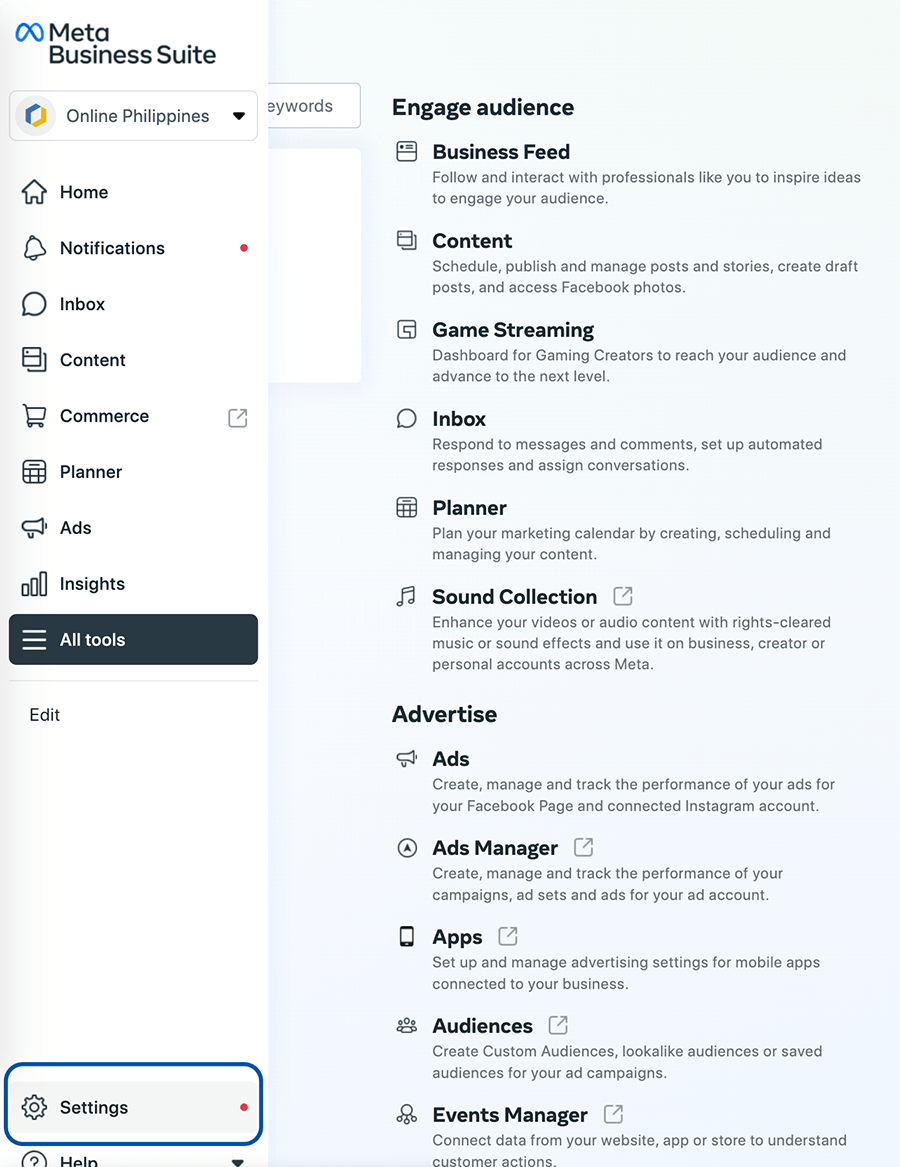
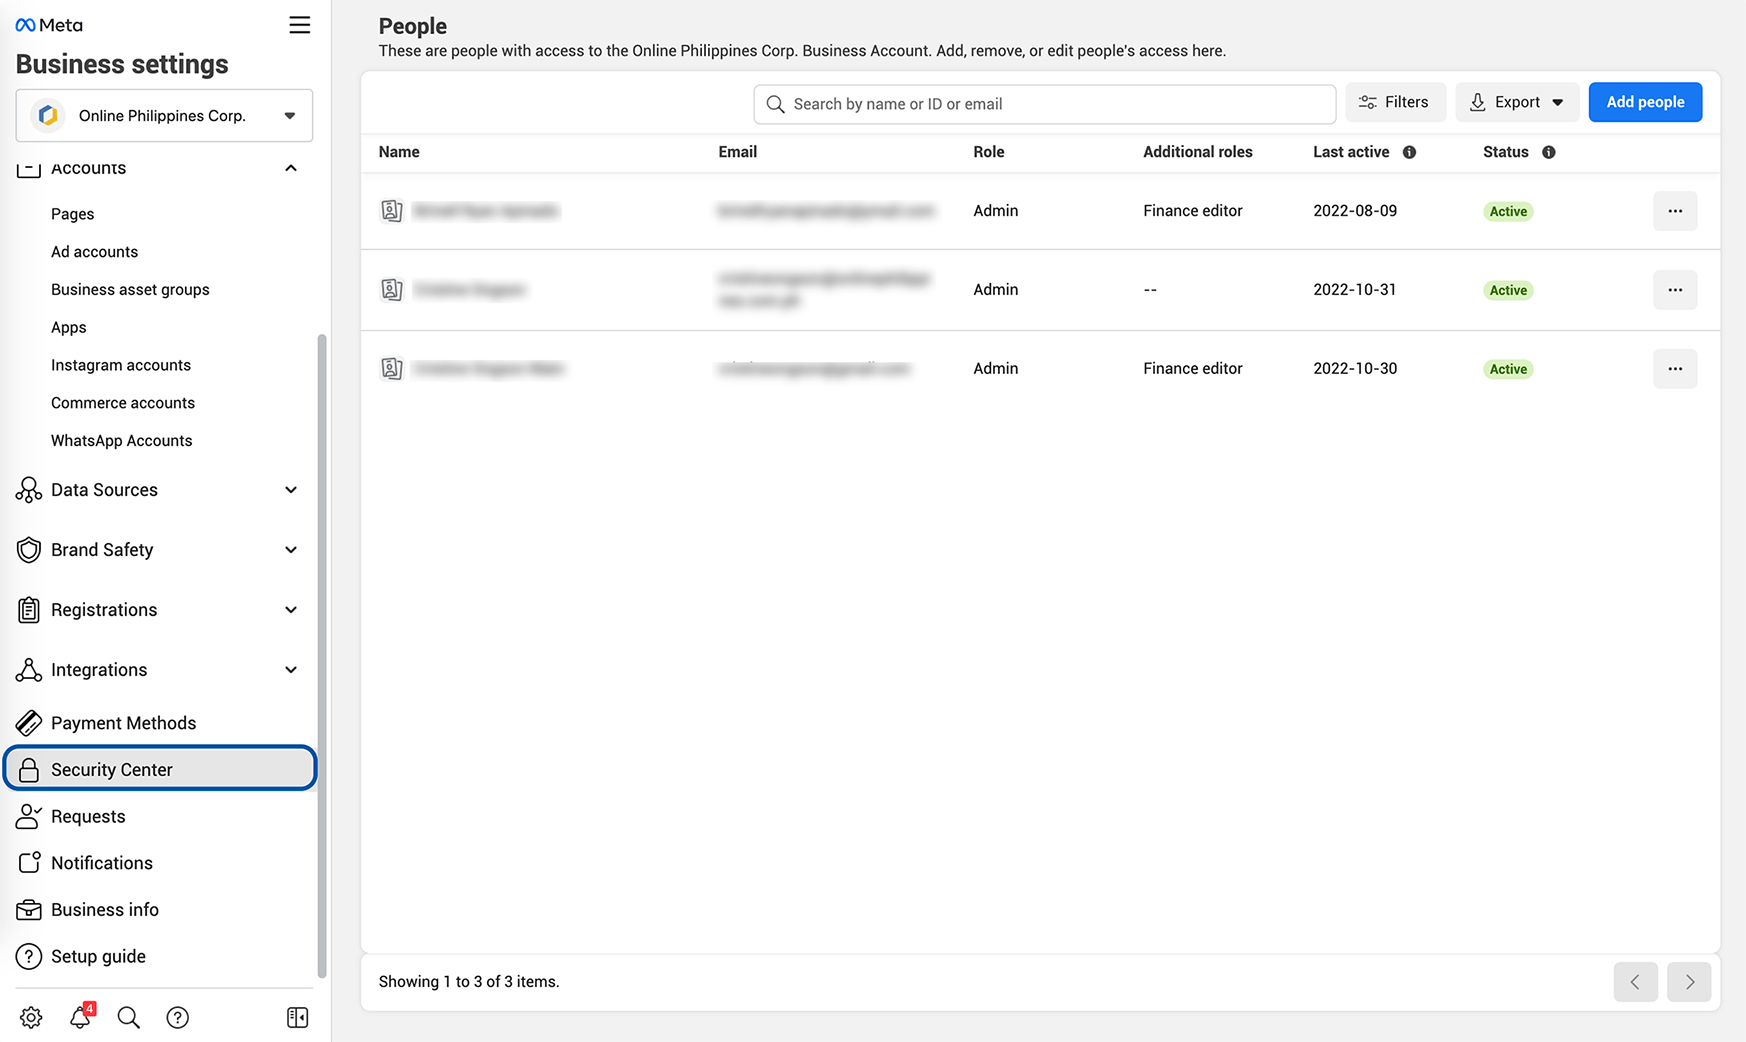
Go to your Meta Business Suite, this is where all your assets and access are to your business accounts. Your Facebook Page will be housed under the Meta Business Suite (this was also previously called “Business Manager” some few years back). From the front page, navigate to “Security Settings” and ensure that ALL admins do the same step. From the main page of the Meta Business Suite, click the gear icon in the lower left tab, and select Settings.
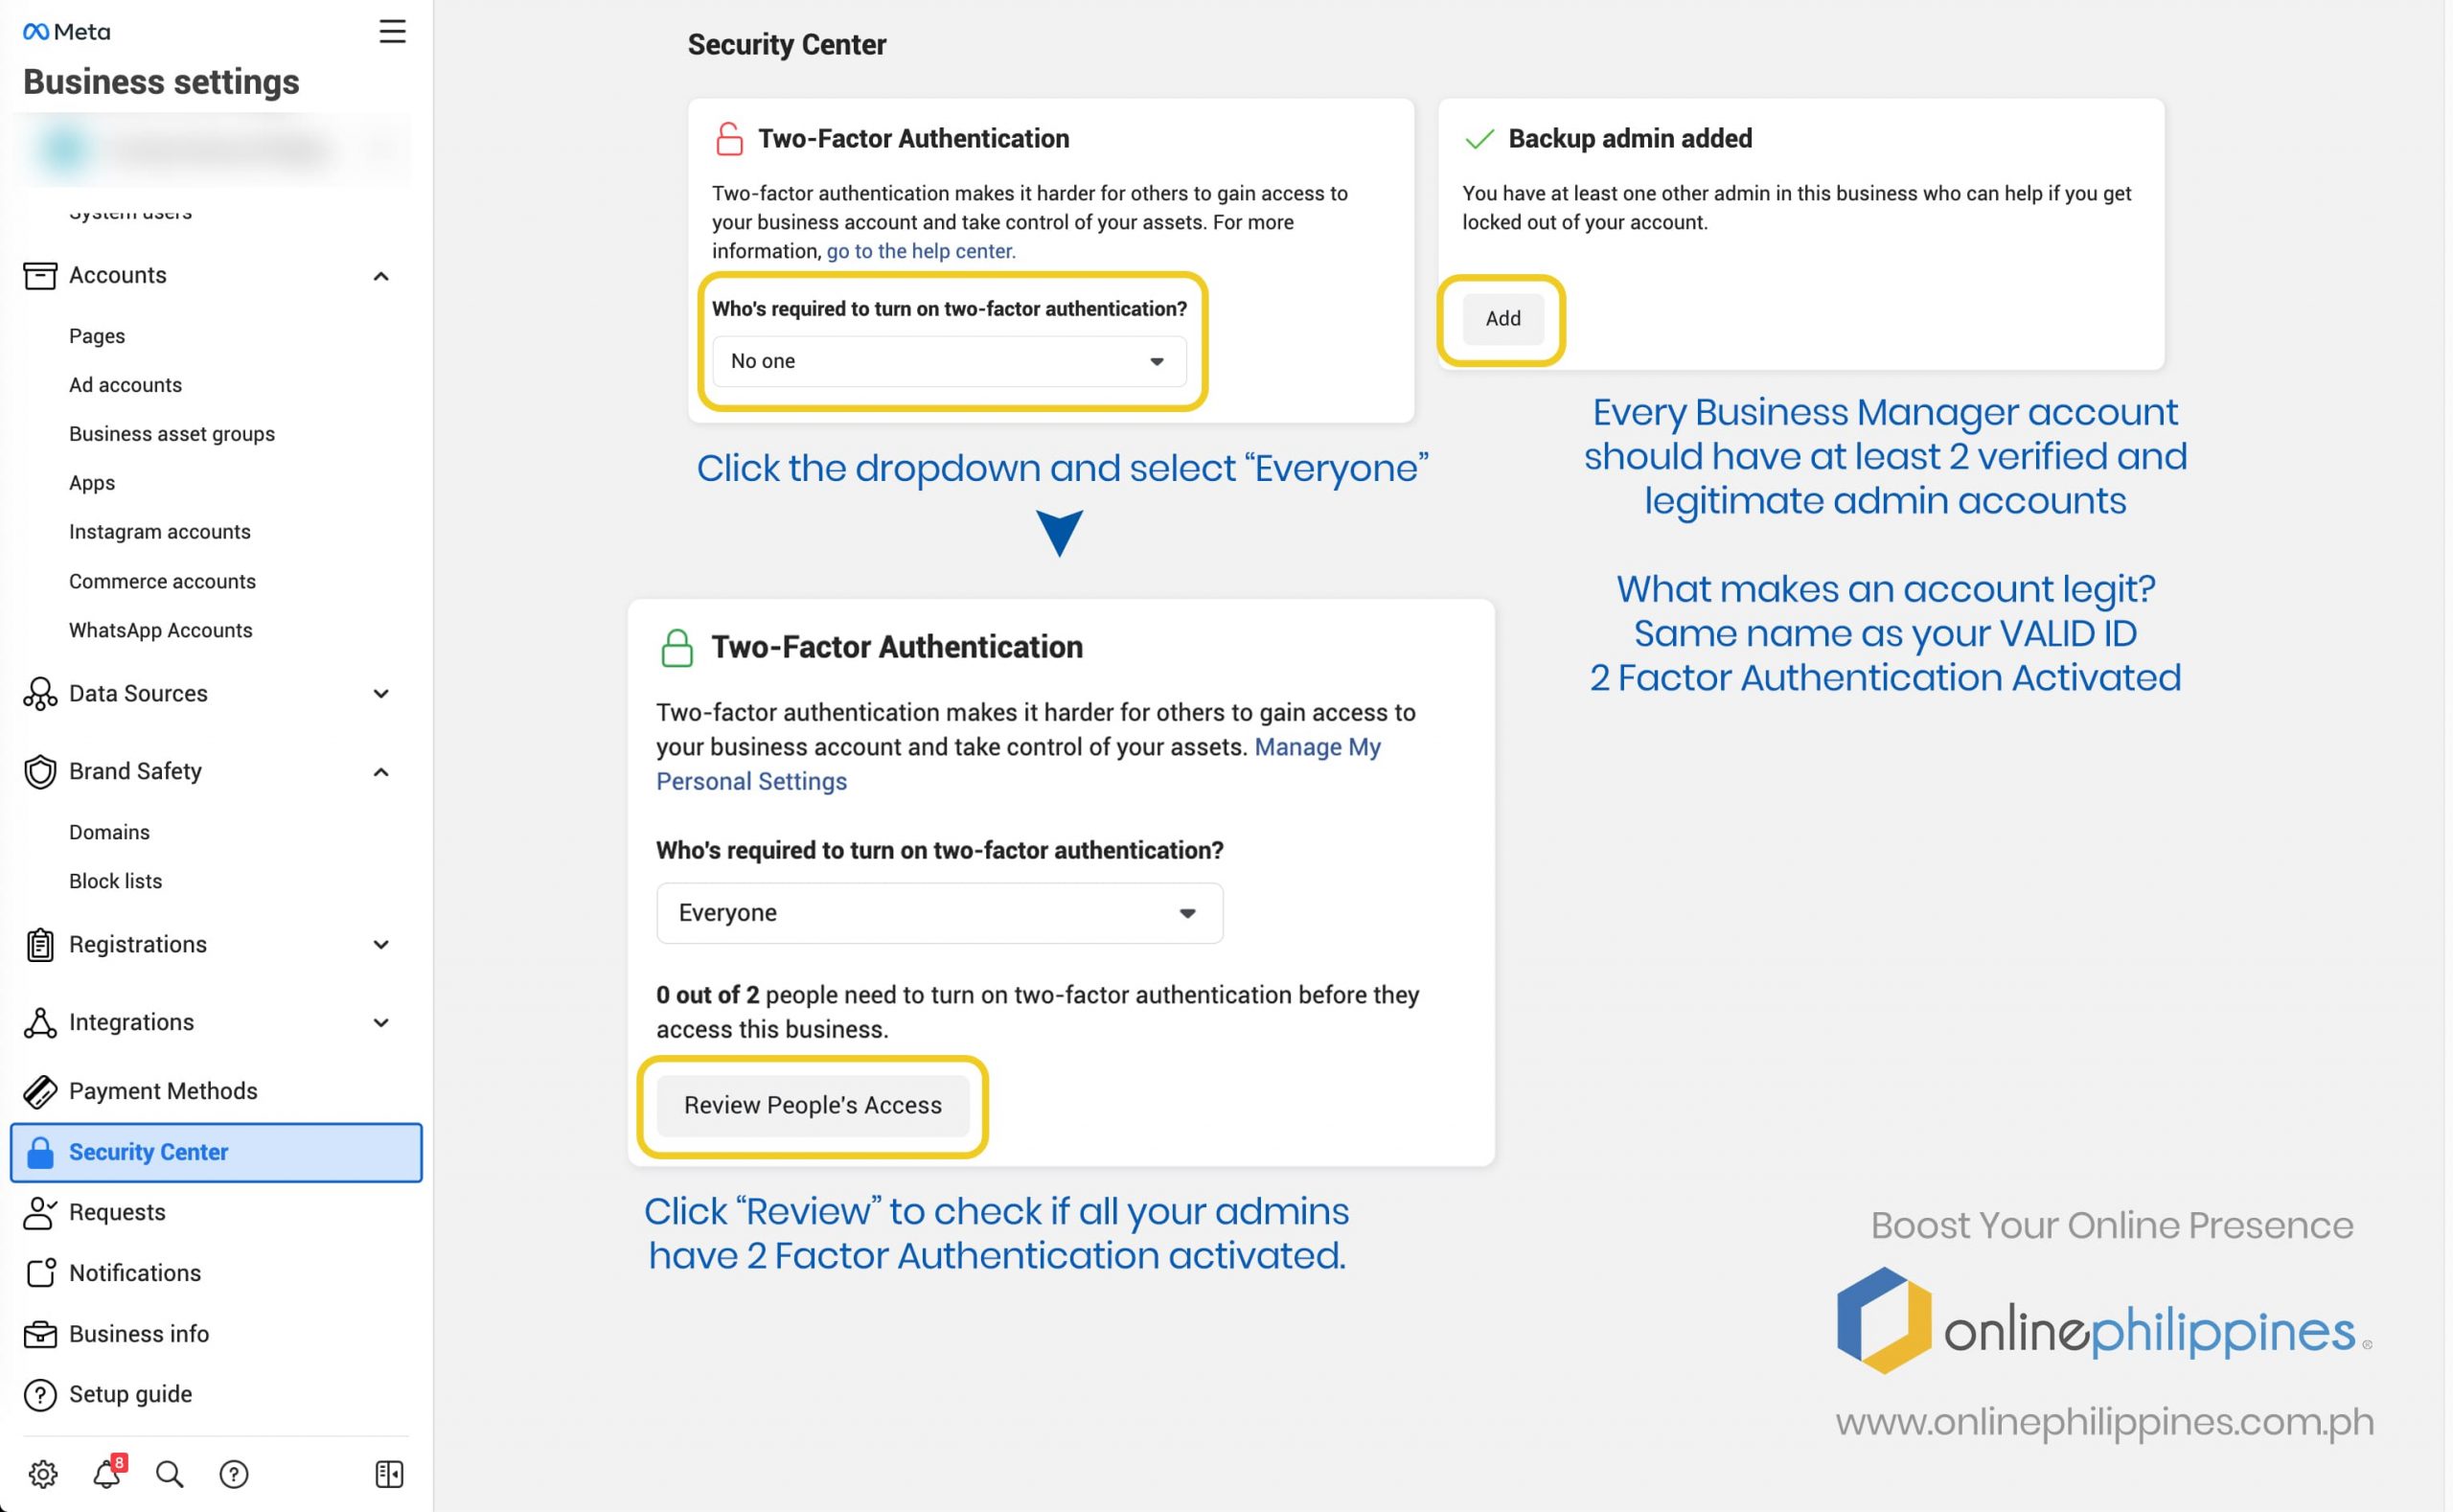
In the Security Center, you can enable your Two Factor Authentication (2FA) there, click the button and follow the prompts to set up your 2FA. Again, all admins should perform that step to ensure the safety of your account. You may also click “Review People’s Access” to see which admins still need to set up 2FA.
Assign Backup Admins
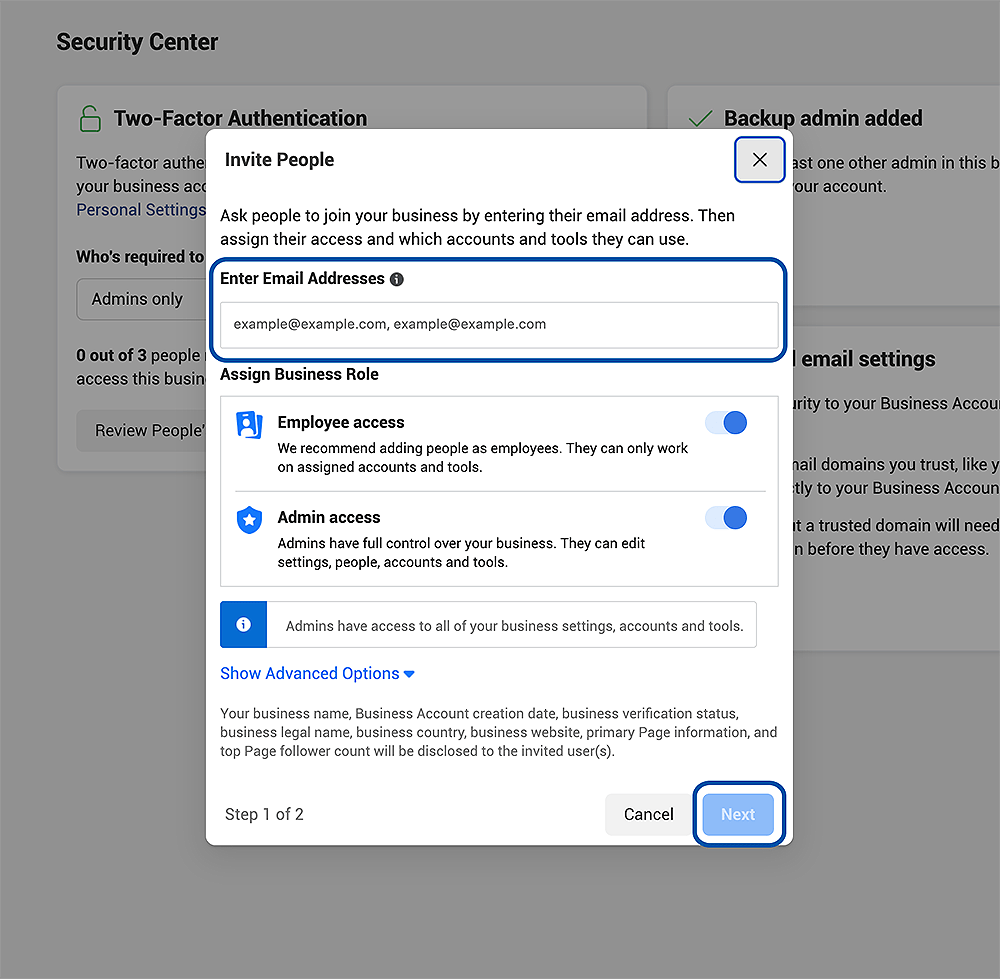
While you can never be sure what happens to your personal Facebook account, ensuring that there is another legitimate Faebook user who is a c0-admin of your pages. Do make sure that this backup admin uses a legitimate account with the same Facebook Name as their Valid ID’s name. Your valid ID will be necessary to verify the legitimacy and ownership of your account. You can see all admins in the “People” tab in the Business Settings.
Review and Remove All Inactive Admins
You may have previously given access to your Page to past employees, friends or family members. If they are not actively managing your page and are not the assigned backup admin, then remove them from your admin list.

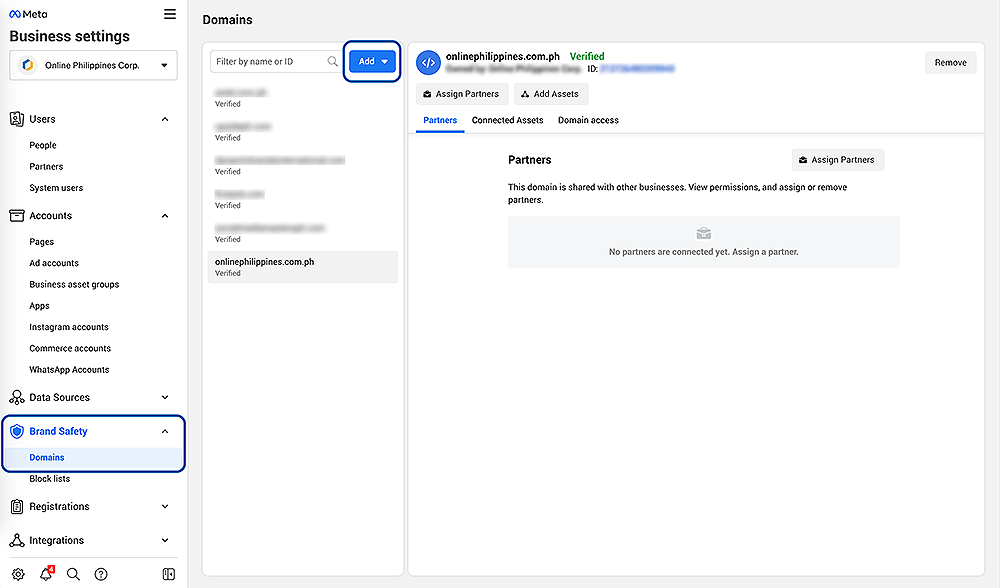
Set Up Domain Verification
If you have a website and are planning on bringing people from Facebook to that link, you need to set up domain verification. For this step, you will need to have access to your domain or where your domain’s nameservers are.
Domain verification also allows you to manage editing permissions over your links and content in order to help prevent misuse of your domain. This includes both organic and paid content. Managing your ad link editing permissions also helps ensure only trusted employees and partners represent your brand.
Once you have verified your domain, you can assign specific Pages editing permissions for your ads. Pages associated with your Business Manager that do not have editing permissions won’t be able to make changes to your ads.
It’s free to verify your domains. There are 3 domain verification methods:
- Add a meta tag to your domain’s home page
- Upload an HTML file to your web directory and confirm ownership of your domain in Business Manager
- Add a DNS TXT entry to your DNS record to confirm ownership of your domain
Here is Facebook’s step by step guide on how to verify your domain.
Make Sure All Your Posts and Ads are Compliant with Facebook’s Policies
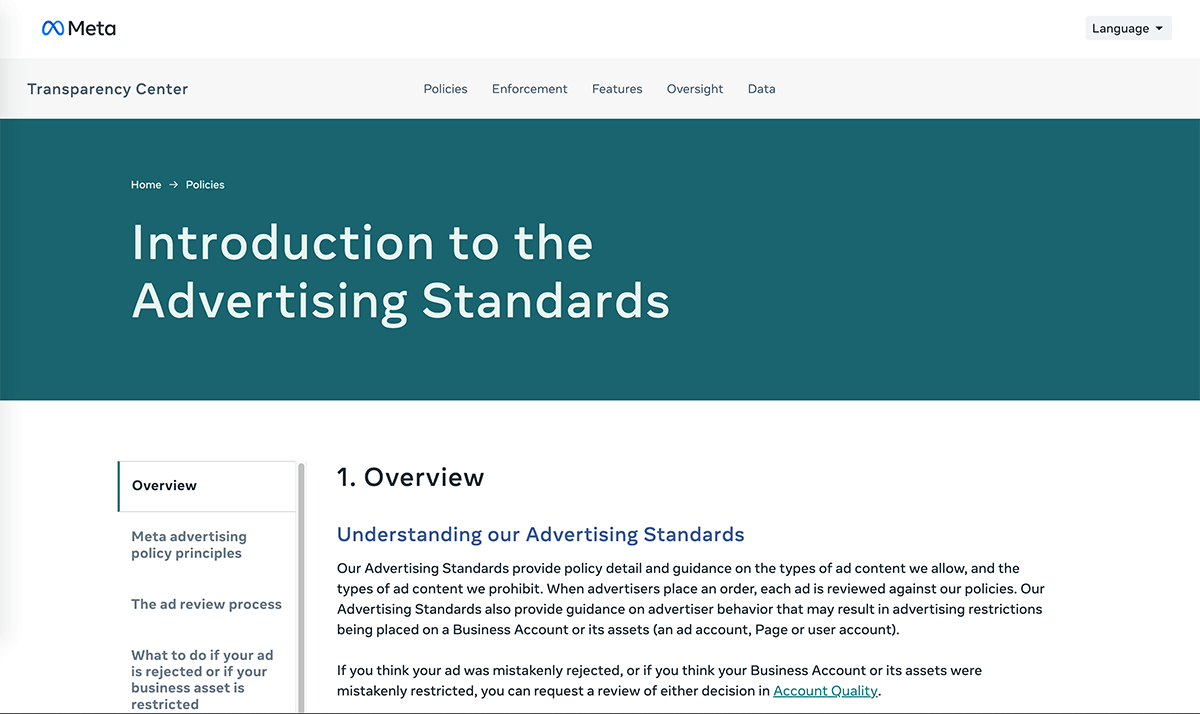
No matter how strict you set up your security, if your posts violate the content policy of Facebook, then you really are just waiting for Facebook to take your Page down. Make sure to review the Community Standards here to avoid getting penalized.
Check for Any Violations Under the Account Quality Page
Meta Account Quality provides a centralized place to monitor and improve compliance with Meta Advertising Standards, Commerce Policies and other policies and terms. You can also use it to monitor your feedback on appeals you have sent before. Learn all about Account Quality here.
View the status of your Facebook account
To find further detail on any issues with your Facebook account:
- Go to Account Quality.
- Select Facebook account.
Here, you can review the status of the ad accounts, commerce accounts, catalogs and Pages that are associated with your Facebook account. Click on an account, catalog or Page to view any ads or items that are available for another review.
View the status of your Business Accounts
To find further detail on any issues with your Business Account(s):
- Go to Account Quality.
- Select Meta Business Accounts.
Here, you can review the status of the ad accounts, commerce accounts, catalogs and Pages that are associated with a Business Manager account.
Request another review of rejected ads, ad sets, campaigns or items
If you believe your ad or item was incorrectly rejected, you can request another review. To request another review:
- Go to Account Quality.
- Click to select your account or catalog with the rejected ads or assets.
- Select ad(s), ad sets, campaigns or items that you believe were incorrectly rejected.
- Click Request review and select Submit.
Track your review status
You can track the status of any requested review at any time in Account Quality.
If your review is successful, the ad will start running if scheduled to do so, and if the review is for an item, it will become available to apply in future ads and/or shop. If the review is rejected, the ad or item will stay rejected, and you won’t be able to submit another review request for the same ad or item.
Still Got Deactivated?
If you’ve been deactivated on Facebook, the first thing to do is make sure that you’ve done nothing wrong.
If Facebook determines that there is no reason for your page to be deactivated, it will return you to the same place it was when it was deactivated.
Facebook has a range of tools that can help you identify how best to improve your page’s performance and make sure that it is engaging with its community. You should use these tools mentioned above before contacting Facebook about possible errors on your Page.
Review all the other privacy and security settings such as recent logins, authorized devices, etc. If your page gets disabled, use this as a reference on what to do next. Facebook will send all feedback regarding appeals on the Account Quality page, not an external website. Check back soon on this blog to see how you can appeal for a reactivation of your Facebook Page!
Found this article useful? Share it to a business page admin to help them out! If you want to skip the headache of managing the nitty gritties of social media, our professional social media service may be the sign you need to outsource your marketing to the pros so you can focus on growing and running your business instead. Check out our service here.

No Comments